Main Window Overview

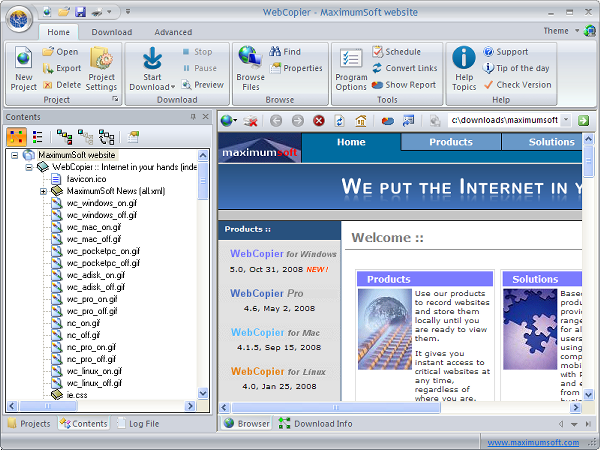
WebCopier's main window has seven main components:

1 - Ribbon bar gives you access to most of WebCopier's commands and features.

2 - Quick Access Toolbar provides access to top commands.

3 - Contents Tree graphically displays the website's structure.

4 - Integrated browser allows you to
· View downloaded files, even during the download
· Browse the Internet
· Print the entire website, or only a specific part of it

5 - Projects / Contents Tree / Log File Window tabs let you switch between Projects list, Contents Tree and the Log File Window. The Projects list shows all WebCopier projects you have worked before. The Log File Window shows a summary of the download process.

6 - Browser / Download Info Window tabs
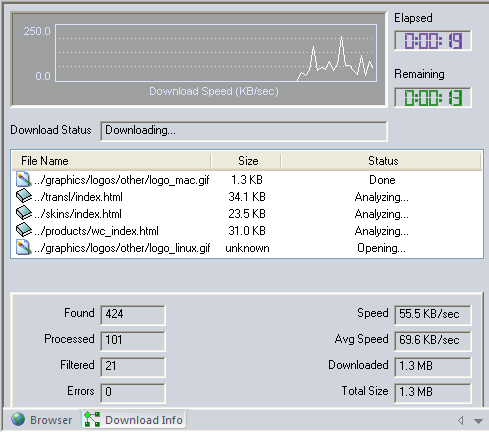
Download Info window displays the information about the ongoing download:
· Number of Found, Processed (downloaded) and Filtered (excluded from the download based on certain restrictions, URL Filters or File Filters) links.
· Number of Errors during the download session.
· Current and Average download speed.
· Elapsed and estimated Remaining time.
· Amount Downloaded during this session and Total size of the site (downloaded during all session for the project).

7 - Status bar explains the links in the Integrated browser as mouse pointer passes over them.
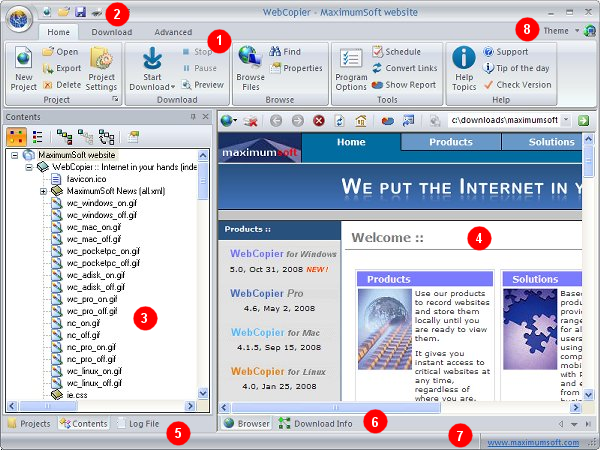
Main Window
 

Create a New Project

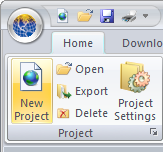
New Project button

It's easy to download a website with WebCopier. Just follow these steps:

Create a new project.
Press the "New Project" button on the Ribbon bar.

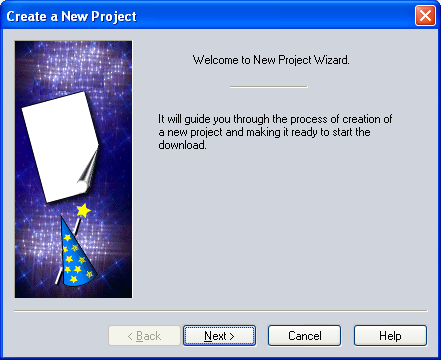
The "Create a New Project" Wizard will guide you as you prepare a new download.

  • Give the project a title.
  • Select the folder where the downloaded files will be saved.
  • Specify the website's address.
  • You can choose to import web browser Bookmark, or to select a local file.

Wizard

Download website


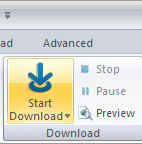
Press the "Start Download" button on the Ribbon bar.

Start Download
Download Info

The download will begin, and the Download Info window will be shown.

This window shows each file's status as it is downloaded.


Browse downloaded website

Integrated Browser

When a download is completed you can browse your copy of a website.

To be exact, you can start the browsing even when the download is still going on, with some restrictions, of course.

You can use WebCopier integrated browser.

You can use any regular browser, like Internet Explorer, Firefox, Chrome, Safari, etc.

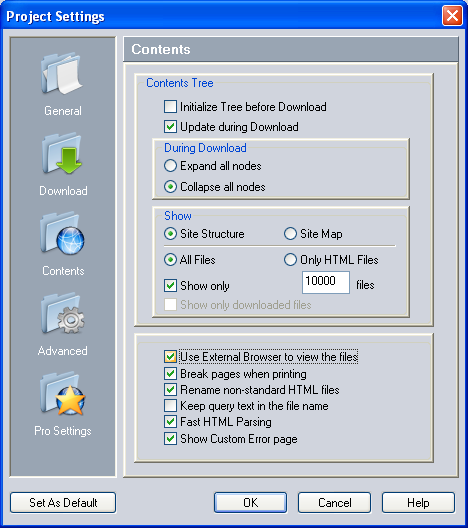
Check the option "Use External Browser" in the "Project Settings / Contents" window.

Then double click on the fist tree subnode.

External

Advanced Topics


That is all you need to do to get a copy of a website.

As you can see, WebCopier is very easy to use.

However, it is also quite powerful.

Lets look at some Advanced topics.
You will learn how to download exactly what you need, how to schedule your downloads and put them on a CD.


How to control your downloads

Download Restrictions

There are several methods to get exactly what you need from the Web.

Put some restrictions.

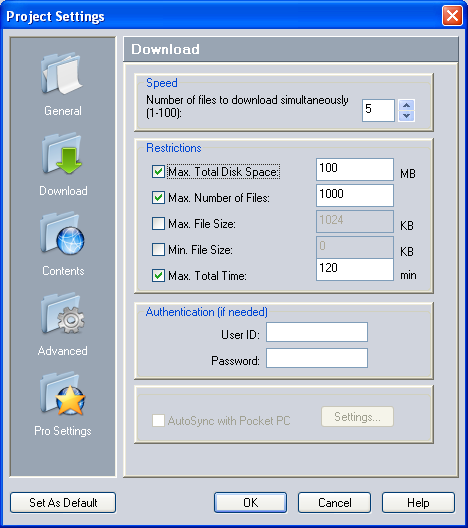
You can specify what file types to download, set the maximum disk space, number of files, maximum file size and limit total download time.

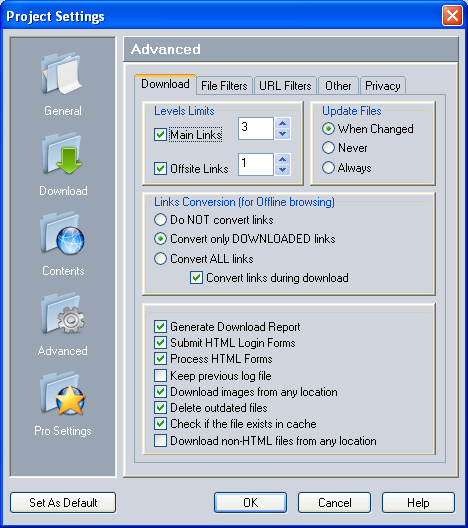
Limit a download Links Level.

That will tell WebCopier how deep to dig a website.

Link Level Restrictions
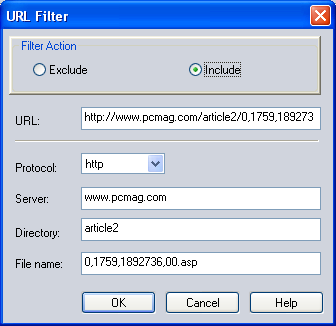
URL Filter

The most efficient way of controlling your downloads is using URL Filters.

They can specify (based on protocol, server, directory or file name) which files should be loaded and which should be skipped.

Also you can tell the program to download links that are located below the starting address only.


How to schedule downloads


You do not have to start downloads manually.

You can schedule project(s) download and WebCopier will do it for you automatically.

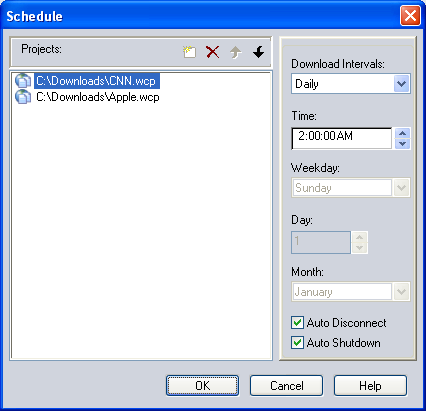
Press the "Schedule" button on the Ribbon bar.

Schedule Button
Schedule window

The Schedule window will be displayed.

Add projects you want to download and set a time.

Press OK to close the window.

WebCopier will wait until the time comes to start the download.


How to copy downloaded files to CD / DVD / USB

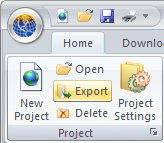
Export button

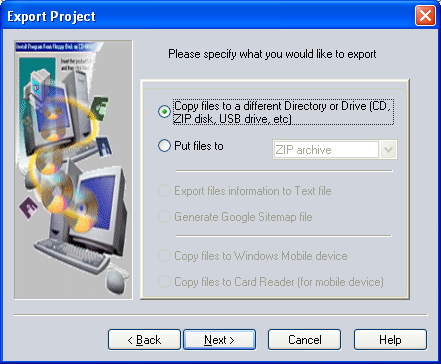
WebCopier can copy downloaded files on CDs, DVDs, USB drives.

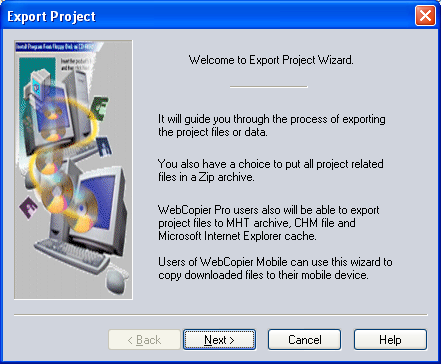
Start the "Export Project" wizard by pressing "Export" button on the Ribbon bar.

The wizard window will be displayed.

Export Project wizard
Copy Files option

Choose "Copy files..." option.

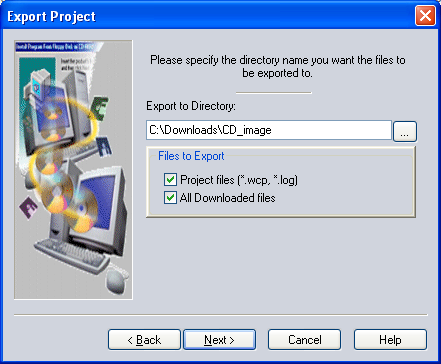
Specify the destination drive.

WebCopier can copy all required files directly to CD (requires DirectCD to be installed).

If you don't have DirectCD you can use the wizard to copy the files to a temporary directory on your hard drive. Then you can use your CD / DVD burner software (like Easy CD Creator) and copy all the files from the temporary directory to a CD / DVD.

Press Finish to close the window.

WebCopier will start copying the files.

Export Project wizard

This is the end of the tour.


Thanks for your attention.

Give WebCopier a try and see by yourself how easy to use and powerful it is!